The 0xc004f211 error code is a common Windows activation issue that users encounter when attempting to activate their operating system.
This error, often accompanied by the message “Windows reported that the hardware has changed,” typically occurs due to significant hardware modifications, such as replacing the motherboard, or when the system fails to validate the product key.
Whether you’re using Windows 10 or Windows 11, the error code 0xc004f211 can disrupt your workflow and leave your system in an unactivated state.
According to Microsoft’s official documentation, this error is tied to the Windows Activation Technologies (WAT), which ensures that your copy of Windows is genuine.
Experts suggest that this issue often arises when the hardware profile no longer matches the one associated with the original activation.
For users encountering 0xc004f211 Windows 10 activation or 0xc004f211 Windows 11 errors, resolving the problem typically involves re-entering the product key, using the Activation Troubleshooter, or contacting Microsoft Support for further assistance.
Understanding the root cause of Windows activation error 0xc004f211 and following structured troubleshooting steps can help restore your system’s functionality efficiently.
In fact, it’s one of the most common issues people run into after making hardware changes. Did you know that 10% of Windows users face activation problems at some point? Crazy, right?
What Causes Windows Activation Error 0xc004f211?
Okay, so picture this: I had just swapped out my old motherboard because I thought it was time for an upgrade. Everything went great, or at least that’s what I thought—until I saw the error code 0xc004f211 flashing on my screen.
I’m not going to lie; I kinda panicked at first. But after some digging, I realized this error happens a lot when you make significant hardware changes, like replacing your motherboard or hard drive.

The thing is, Windows ties its activation to your hardware, so when you swap out something major, it’s like Windows doesn’t recognize your computer anymore.
It’s like when you see someone you know, but they got a drastic haircut, and you’re like, “Is that really you?” Yeah, Windows is giving you that same side-eye.
Another common cause? Using the wrong or invalid product key. Trust me, I’ve been there. I once tried using an old key I found written down in a notebook and guess what? Didn’t work. Go figure!
How to Check If Your Windows Is Activated
Before you start fixing anything, you’ve got to check if your Windows is actually activated. I remember the first time I got an activation error, I didn’t even bother checking—rookie mistake.
So, here’s a little pro tip from my experience: always check your activation status first. It’s super simple.
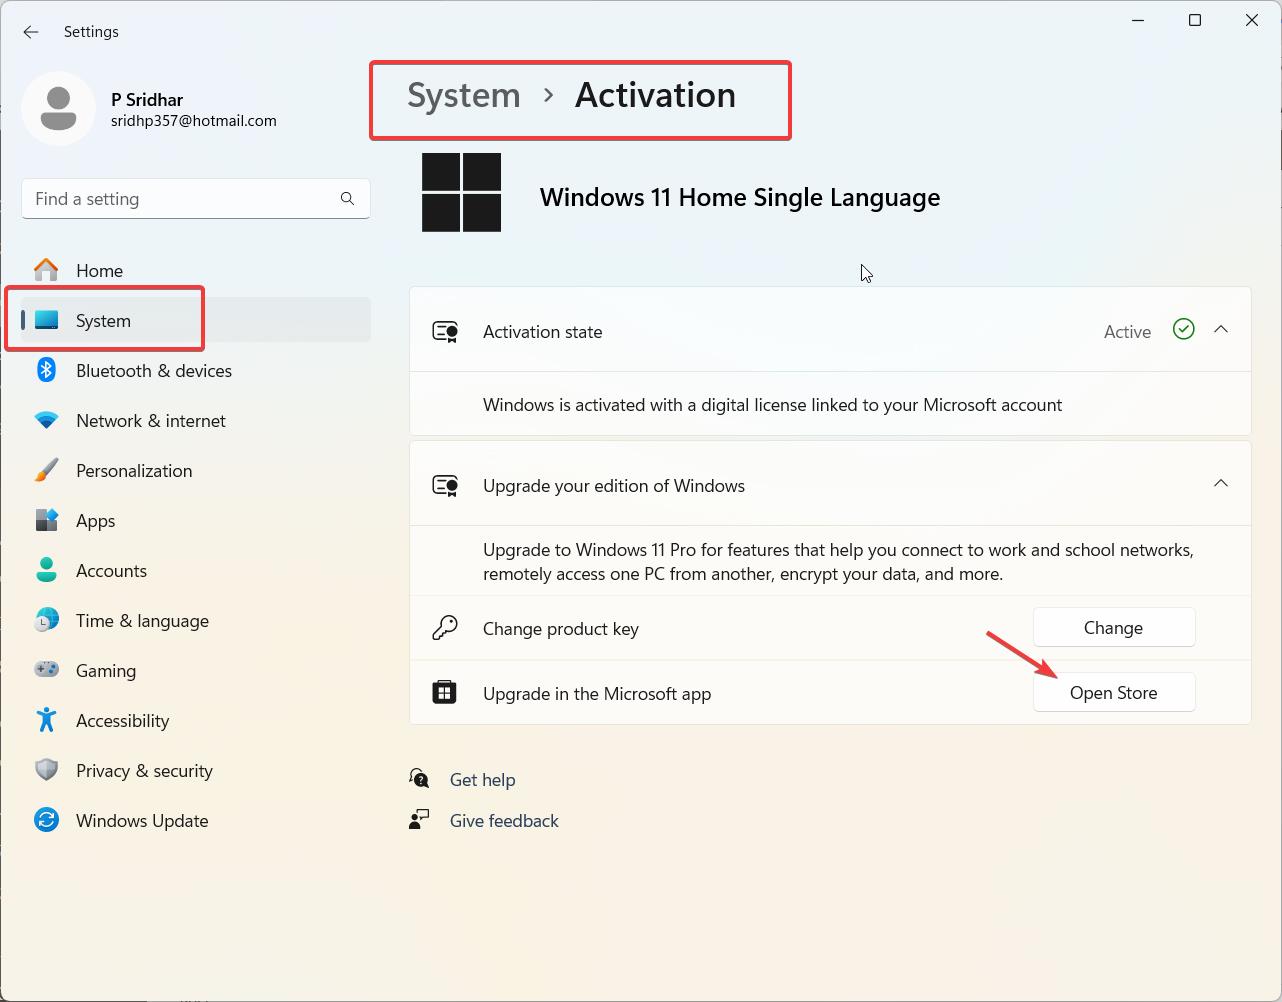
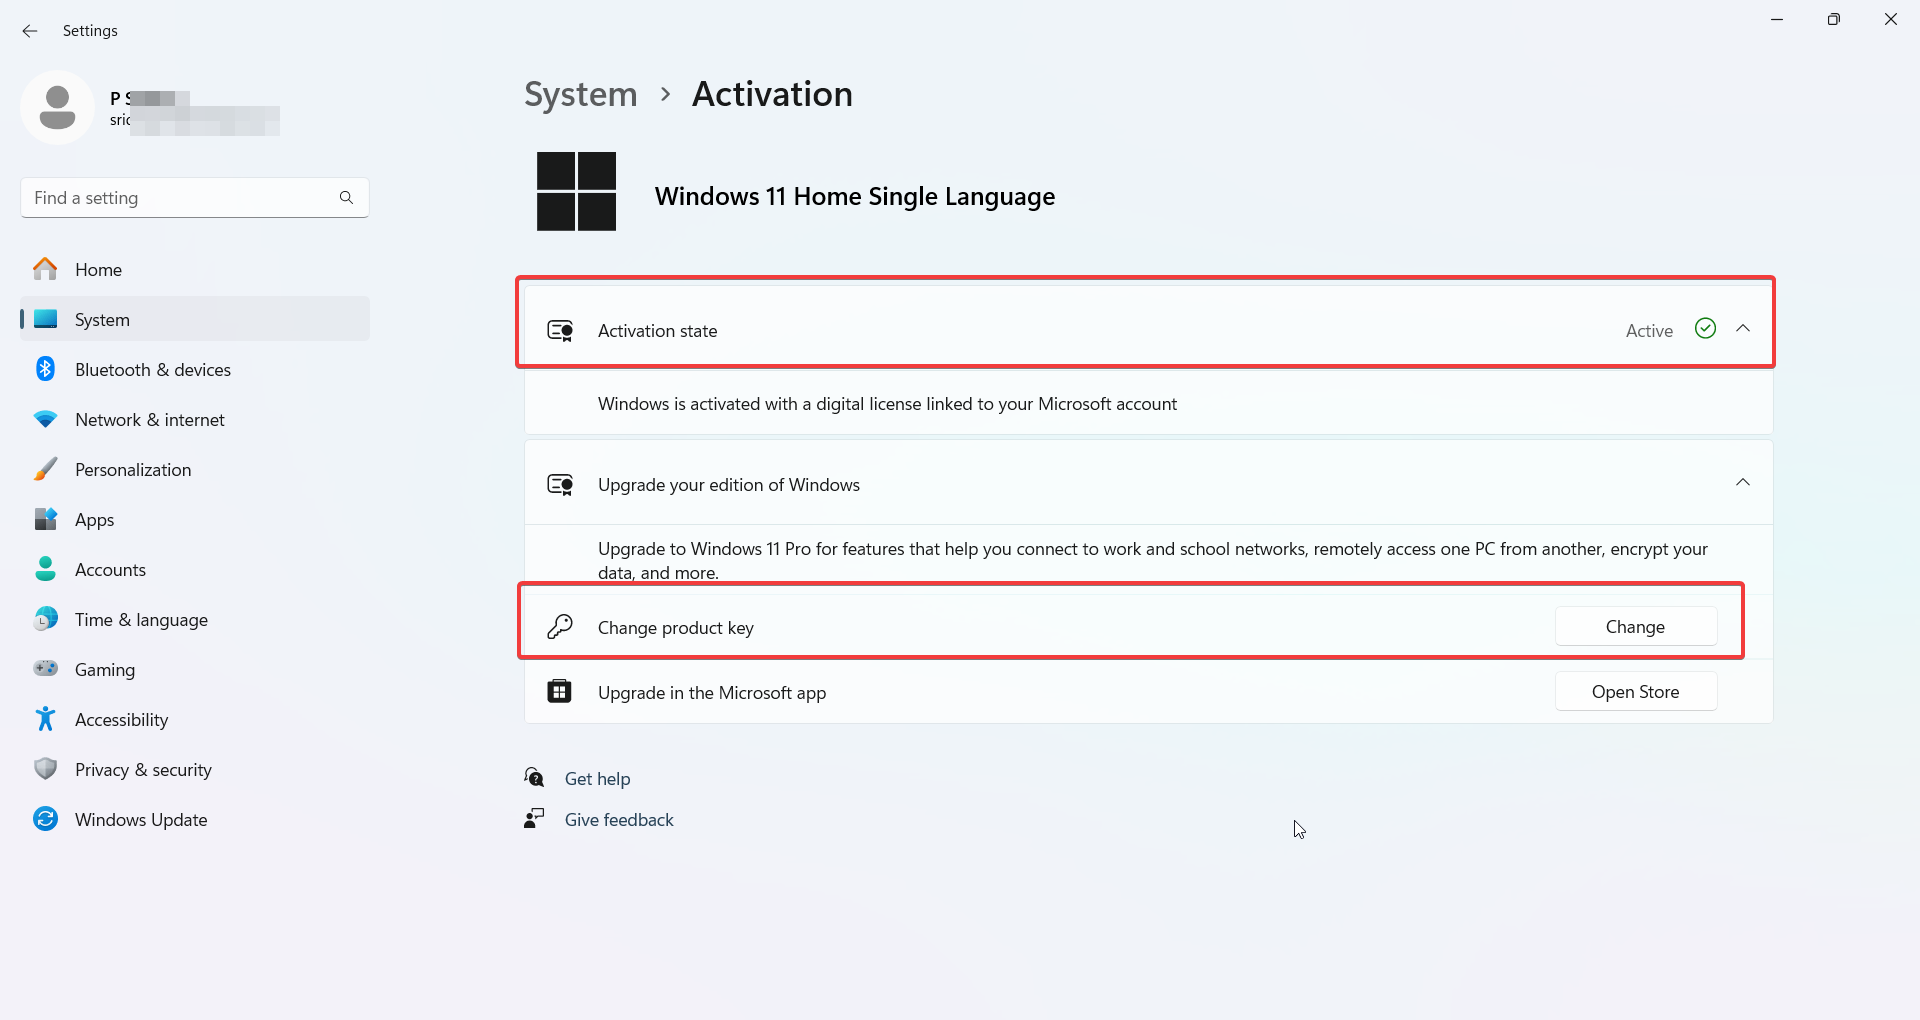
Just go to your Settings, click on Update & Security, and then head over to Activation. If it says “Windows is activated with a digital license,” then you’re good! If not, well, that’s where the trouble begins.
There are two ways Windows usually activates—either through a digital license tied to your Microsoft account (which is, honestly, the way to go) or with a product key. If you’re still using a product key, make sure it’s legit.
I once spent hours trying to activate Windows with a key I thought was valid, only to realize it was from a different version of Windows. Yup, facepalm moment!
Solution 1: Reactivate Windows After Hardware Changes
If you’ve changed your hardware—especially your motherboard—this is probably why you’re seeing the 0xc004f211 error. I’ve been through this dance before.
I upgraded my motherboard, powered up my PC, and suddenly, Windows didn’t know who I was. It felt like getting locked out of my own house. But relax, I got you.
First, head back to your Activation Settings. You’ll see an option to Troubleshoot. Click that, and Windows will try to figure out the problem. If you’ve linked your Windows activation to your Microsoft account (which, by the way, is super important), you should see an option that says I changed hardware on this device recently.
Click that, sign in with your Microsoft account, and follow the prompts. This has saved me more times than I’d like to admit. Seriously, linking your account is like a safety net.
One time, I didn’t link my account, and let me tell you, it was a nightmare. I had to dig through old emails to find my product key, and even then, I wasn’t sure it would work. Don’t be like me—link your account!

Solution 2: Use a Valid Windows Product Key
So, let’s say your issue isn’t related to hardware changes. Maybe you’re using a product key, and it’s just not cutting it. Been there, done that.
I once bought a key from one of those sketchy third-party websites (hey, we’ve all been tempted by those cheap deals), and surprise, surprise—it didn’t work. Lesson learned: always get your product key from a legit source.
To check if your product key is valid, go to your Activation Settings and click on Change product key. Enter the key you have—if it’s valid, Windows will activate without a hitch.
If not, you’ll get an error message, probably telling you the key is invalid or has already been used. Ouch. If that happens, you’ll need to buy a new key or contact Microsoft support.
Quick tip: If you’re reinstalling Windows on a machine that already had a digital license, you don’t even need a product key! I didn’t realize this until after I’d already bought a new key. Double-check before you spend any money.
Solution 3: Contact Microsoft Support for Assistance
When all else fails, sometimes you just gotta call in the big guns—Microsoft support. I know, talking to customer support can be a headache, but trust me, they can help.
I once spent hours trying every trick in the book, only to end up calling them. To my surprise, they were actually pretty helpful (shocking, I know).
When you contact them, make sure you have all your information ready. They’ll probably want your product key, Microsoft account details, and maybe even some info about your hardware changes.
One time, I called without having my product key handy, and I wasted 30 minutes digging through my emails while the support agent waited. Don’t make that mistake—be prepared!
Most of the time, they’ll be able to activate Windows for you remotely, especially if the issue is related to hardware changes or a product key mix-up. And if they can’t fix it, they’ll at least point you in the right direction.
Preventing Future Windows Activation Errors
Alright, now that you’ve (hopefully) fixed the 0xc004f211 error, let’s talk about how to keep this from happening again. First off, link your Windows activation to your Microsoft account.
I know I’ve said this a few times already, but it’s seriously the easiest way to avoid activation headaches. If you ever change hardware again, you’ll thank me later.
Another tip? Keep your product key somewhere safe. I once lost mine in the chaos of moving apartments, and it took me forever to find it again.
Now, I keep it saved in a secure file on my cloud storage.
Oh, and try not to make too many hardware changes at once. I know it’s tempting to upgrade everything at once but doing it all at the same time can confuse Windows, and that’s when you run into activation problems.
Conclusion
In conclusion, the 0xc004f211 error code is a well-documented Windows activation issue that primarily occurs when the system detects significant hardware changes, such as a motherboard replacement, or when the product key validation fails.
Whether you’re dealing with Windows 10 0xc004f211 or 0xc004f211 Windows 11 activation, the error message “Windows reported that the hardware of your device has changed. Error code 0xc004f211” can be frustrating but is often resolvable with the right steps.
Microsoft’s official support guidelines recommend using the Activation Troubleshooter, re-entering your product key, or contacting their support team for assistance.
Experts emphasize that this error is tied to the Windows Activation Technologies (WAT), which ensures the integrity of your system’s activation status.
For users encountering Windows 11 0xc004f211 or similar issues, staying proactive by keeping your hardware profile updated and ensuring your product key is valid can prevent future activation problems.
While the 0xc004f211 activation error may seem daunting, it’s a manageable issue with clear solutions. By following trusted troubleshooting methods and leveraging official resources, you can restore your system’s activation status and maintain a seamless Windows experience.
Always remember to back up your data and consult Microsoft’s support documentation for the most accurate and up-to-date guidance.
Remember, keeping your Windows activated isn’t just about avoiding pop-ups—it’s about making sure your system runs smoothly and securely. So, whether you’re reactivating after a hardware change or using a new product key, take the time to do it right. Happy troubleshooting!


