Are you unable to install third-party apps on your Windows 11/10 PC? The culprit might be the missing “Choose where to get apps” missing feature. This crucial setting allows users to control app installations, enhancing system security. Here are three quick fixes to resolve this issue.
- Turn off S Mode:
- Open Settings > System > Activation
- Click “Go to the Store” and follow prompts to exit S Mode
- Use Registry Editor (not for Home edition):
- Open Registry Editor
- Navigate to: HKEY_LOCAL_MACHINE\SOFTWARE\Policies\Microsoft\Windows Defender\SmartScreen
- Delete “ConfigureAppInstallControl” and “ConfigureAppInstallControlEnabled”
- Modify Local Group Policy (not for Home edition):
- Open Group Policy Editor
- Go to: Computer Configuration > Administrative Templates > Windows Components > Windows Defender SmartScreen > Explorer
- Set “Configure app install control” to “Not Configured”
Remember to back up your data before making system changes. These solutions should restore the missing feature and allow third-party app installations.
Based on the information provided, I’ll create a blog post addressing the issue of missing app installation options in Windows 11. Here’s the blog post:
- Troubleshooting Windows 10: What to Do When "Choose Where to Get My Apps" Option is Missing
- Troubleshooting the Missing "Choose Where to Get Apps" Option in Windows
- Fixing the Missing "Choose Where to Get Apps" Missing Feature in Windows 10
- Method 1: Change App Installation Settings in Windows 10 Settings
- Method 2: Disable App Recommendations via Group Policy Editor
- Method 3: Allow Apps from Anywhere via Registry Editor
- Conclusion
Troubleshooting Windows 10: What to Do When “Choose Where to Get My Apps” Option is Missing
In the ever-evolving world of Windows, users occasionally encounter unexpected hurdles. One such issue that has been puzzling some Windows 10 users is the absence of the Choose where to get apps missing option in the Advanced app settings. If you’ve found yourself in this situation, don’t worry – you’re not alone, and there’s likely a simple explanation. Let’s dive into this issue and explore how to resolve it.
Understanding the Problem
Many Windows users prefer to install apps from sources other than the Microsoft Store. This could be for various reasons, such as accessing specialized software or using trusted third-party applications. Normally, Windows provides an option to allow app installations from external sources. However, some users have reported that this option is mysteriously missing from their settings.
The Likely Culprit: Windows 10 S Mode
If you’re experiencing this issue, the most probable cause is that your system is running Windows 10 in S Mode. S Mode is a version of Windows that’s designed to be more secure and stable by only allowing app installations from the Microsoft Store.
How to Check if You’re in S Mode
To verify whether your system is in S Mode:
- Open the Settings app
- Navigate to System
- Select “Activation”
- Look for the edition information
If you see “Windows 10 Home in S mode” (or another edition followed by “in S mode”), this confirms that S Mode is active on your system.
Switching Out of S Mode
To regain the ability to install apps from external sources, you’ll need to switch out of S Mode. Here’s how:
- Open the Start menu and search for “Microsoft Store”
- In the Microsoft Store, search for “Switch out of S Mode”
- You should see a page with information about switching out of S Mode
- Click the “Get” button to begin the process
- Follow the on-screen instructions to complete the switch
It’s important to note that switching out of S Mode is a one-way process. Once you’ve made the switch, you cannot return to S Mode without a full system reset.
Benefits and Considerations
Switching out of S Mode offers several benefits:
- Freedom to install apps from any source
- Access to a wider range of software
- Ability to use alternative web browsers
However, it’s crucial to consider the following:
- Increased responsibility for system security
- Potential for decreased battery life and performance
- Higher risk of malware if not cautious with app sources
After Switching: Accessing Advanced App Settings
Once you’ve switched out of S Mode, you should be able to access the full range of app installation options:
- Go to Settings > Apps > Advanced app settings
- You should now see the “Choose where to get my apps” option
- Select “Anywhere” to allow installations from external sources
Troubleshooting the Missing “Choose Where to Get Apps” Option in Windows
Have you ever tried to install an app on your Windows PC, only to find that the crucial “Choose where to get apps” option is mysteriously absent?
This seemingly small issue can significantly impact your ability to control and customize your app installation sources.
Understanding the “Choose Where to Get Apps” Option
Before we dive into the fixes, let’s briefly discuss what this option actually does and why it’s important for Windows users.
What is it?
The “Choose where to get apps” setting is a security feature in Windows that allows you to control the sources from which your system can download and install new programs. It’s typically found in the Windows Settings app under “Apps” or “Apps & features,” depending on your Windows version.
Why is it important?
This option provides three key choices for app installation:
- Microsoft Store only: The most secure option, limiting installations to Microsoft’s curated marketplace.
- Microsoft Store and trusted sources: A balanced approach, allowing installations from the Store and verified publishers.
- Anywhere: The most flexible option, enabling app installations from any source on the internet.
Having control over these settings is crucial for balancing security with the freedom to install apps from various sources based on your needs and comfort level.
Common Causes for the Missing Option
Several factors can lead to the disappearance of the “Choose where to get apps” option:
- Windows S Mode: If enabled, this restricts app installations to the Microsoft Store only.
- Registry misconfigurations: Incorrect settings in the Windows Registry can hide this option.
- Group Policy settings: Certain Group Policy configurations may disable or hide the option.
- Microsoft Store issues: Problems with the Store app itself can affect related settings.
Now that we understand the background, let’s explore how to fix this issue step-by-step.
Solution 1: Disable Windows S Mode
If you’re running Windows in S Mode, you’ll need to switch out of it to regain full control over app installations. Here’s how:
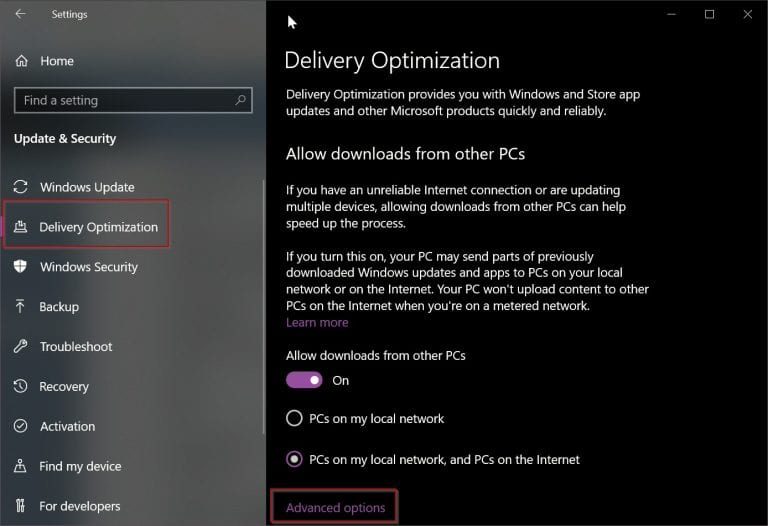
- Press Win + I to open Windows Settings.
- Navigate to System > Activation.
- Look for the “Switch to Windows 11 Pro” section and click “Go to the Store.”
- On the “Switch out of S mode” page, click the “Get” button.
After completing this process, restart your computer and check if the option has reappeared.
Solution 2: Modify the Windows Registry
Caution: Before making any changes to the Registry, always create a backup to prevent potential system issues.
- Press Win + R, type “regedit,” and hit Enter.
- Navigate to: HKEY_LOCAL_MACHINE\SOFTWARE\Policies\Microsoft\Windows Defender\SmartScreen
- In the right pane, delete the “ConfigureAppInstallControl” and “ConfigureAppInstallControlEnabled” keys if they exist.
- Close the Registry Editor and restart your PC.
Solution 3: Adjust Group Policy Settings
For Windows Pro, Enterprise, and Education editions:
- Press Win + R, type “gpedit.msc,” and hit Enter.
- Navigate to: Computer Configuration > Administrative Templates > Windows Components > Windows Defender SmartScreen > Explorer
- Double-click on “Configure app install control.”
- Select “Not Configured” and click Apply > OK.
Solution 4: Troubleshoot Microsoft Store Issues
If the problem persists, it may be related to the Microsoft Store app itself. Try these steps:
- Update the Microsoft Store app to the latest version.
- Reset the Store cache by running “WSReset.exe” from the Run dialog.
- If necessary, re-register the Microsoft Store using PowerShell commands.
For detailed instructions on these processes, consult Microsoft’s official documentation or seek help from their support team.
Preventive Measures and Best Practices
To avoid future issues with app installation settings:
- Regularly update Windows to ensure you have the latest security features and bug fixes.
- Be cautious when making manual changes to the Registry or Group Policy settings.
- Keep your Microsoft account in good standing to prevent any store-related issues.
- Consider using a reliable third-party antivirus solution for an extra layer of protection when installing apps from various sources.
Fixing the Missing “Choose Where to Get Apps” Missing Feature in Windows 10
Starting with Windows 10 build 15042, Microsoft introduced a new security setting that restricts installing apps to only those from the Microsoft Store. When you try to install a third-party app or program, you may see a warning message saying “The app you’re trying to install isn’t a Microsoft-verified app“.
While this setting aims to protect your PC from potentially harmful apps, it can be annoying if you frequently install software from trusted third-party sources.
Fortunately, Windows 10 provides a few ways to change this app recommendation setting and allow installing apps from anywhere. In this blog post, we’ll walk through 3 methods to turn off app recommendations in Windows 10.
Method 1: Change App Installation Settings in Windows 10 Settings
The easiest way to allow installing apps from anywhere is through the Windows Settings app. Here’s how:
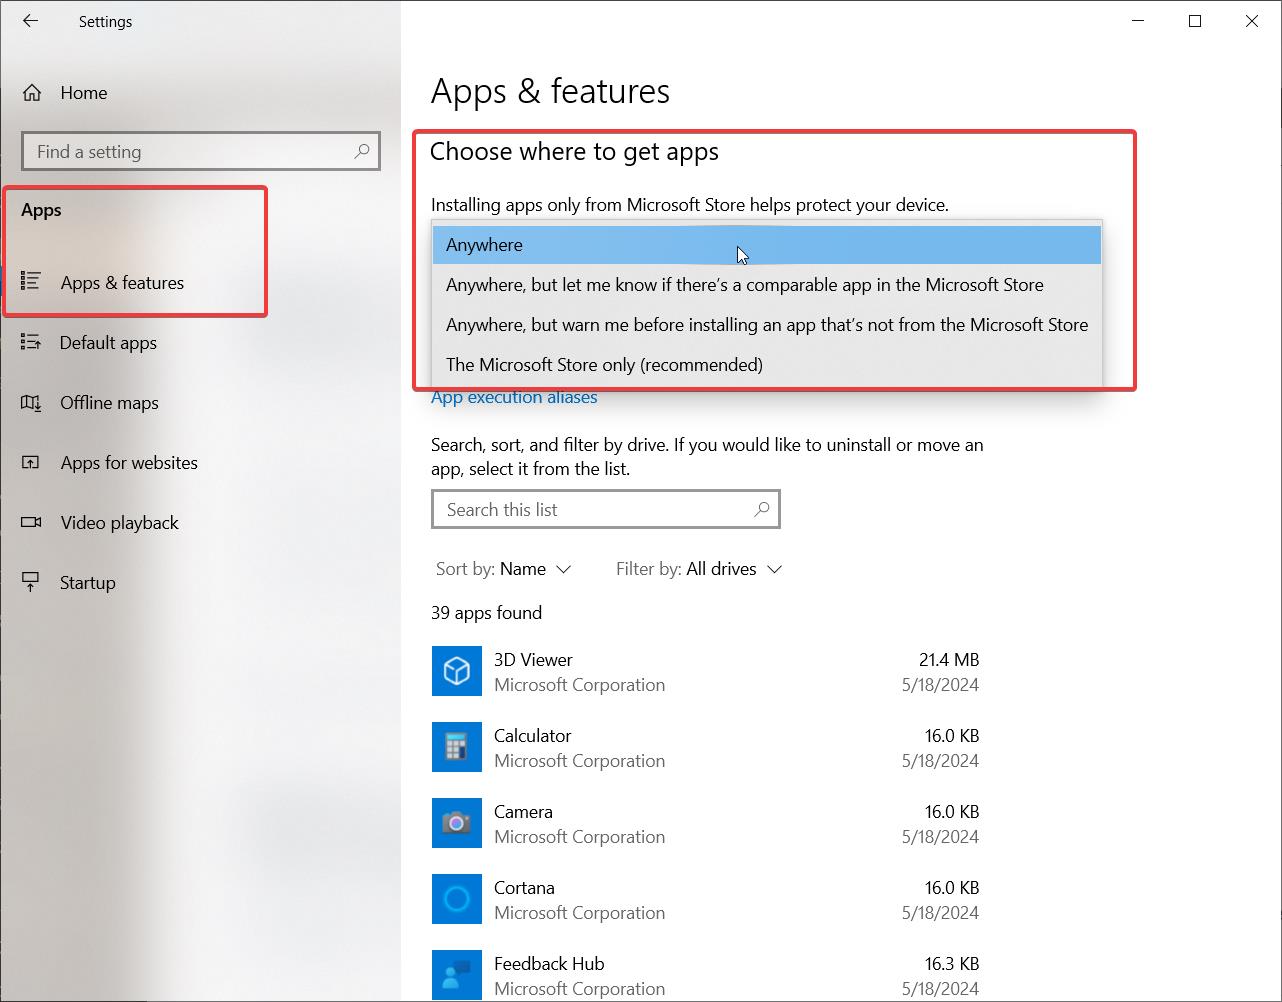
- Open the Settings app by clicking the Start button and then the gear icon.
- Go to the “Apps” category.
- Under “Apps & features“, click the “Choose where to get apps” dropdown menu.
- Change the setting from “The Microsoft Store only (recommended)” to “Anywhere“.
- Close Settings and you’ll no longer see the warning when installing third-party apps.
If the “Choose where to get apps” option is grayed out or missing, you may need to change the app installation policy through the Group Policy Editor or Registry Editor, as explained below.
Method 2: Disable App Recommendations via Group Policy Editor
For those on Windows 10 Pro, Enterprise, or Education, the Local Group Policy Editor provides an easy way to configure app installation settings. Here are the steps:
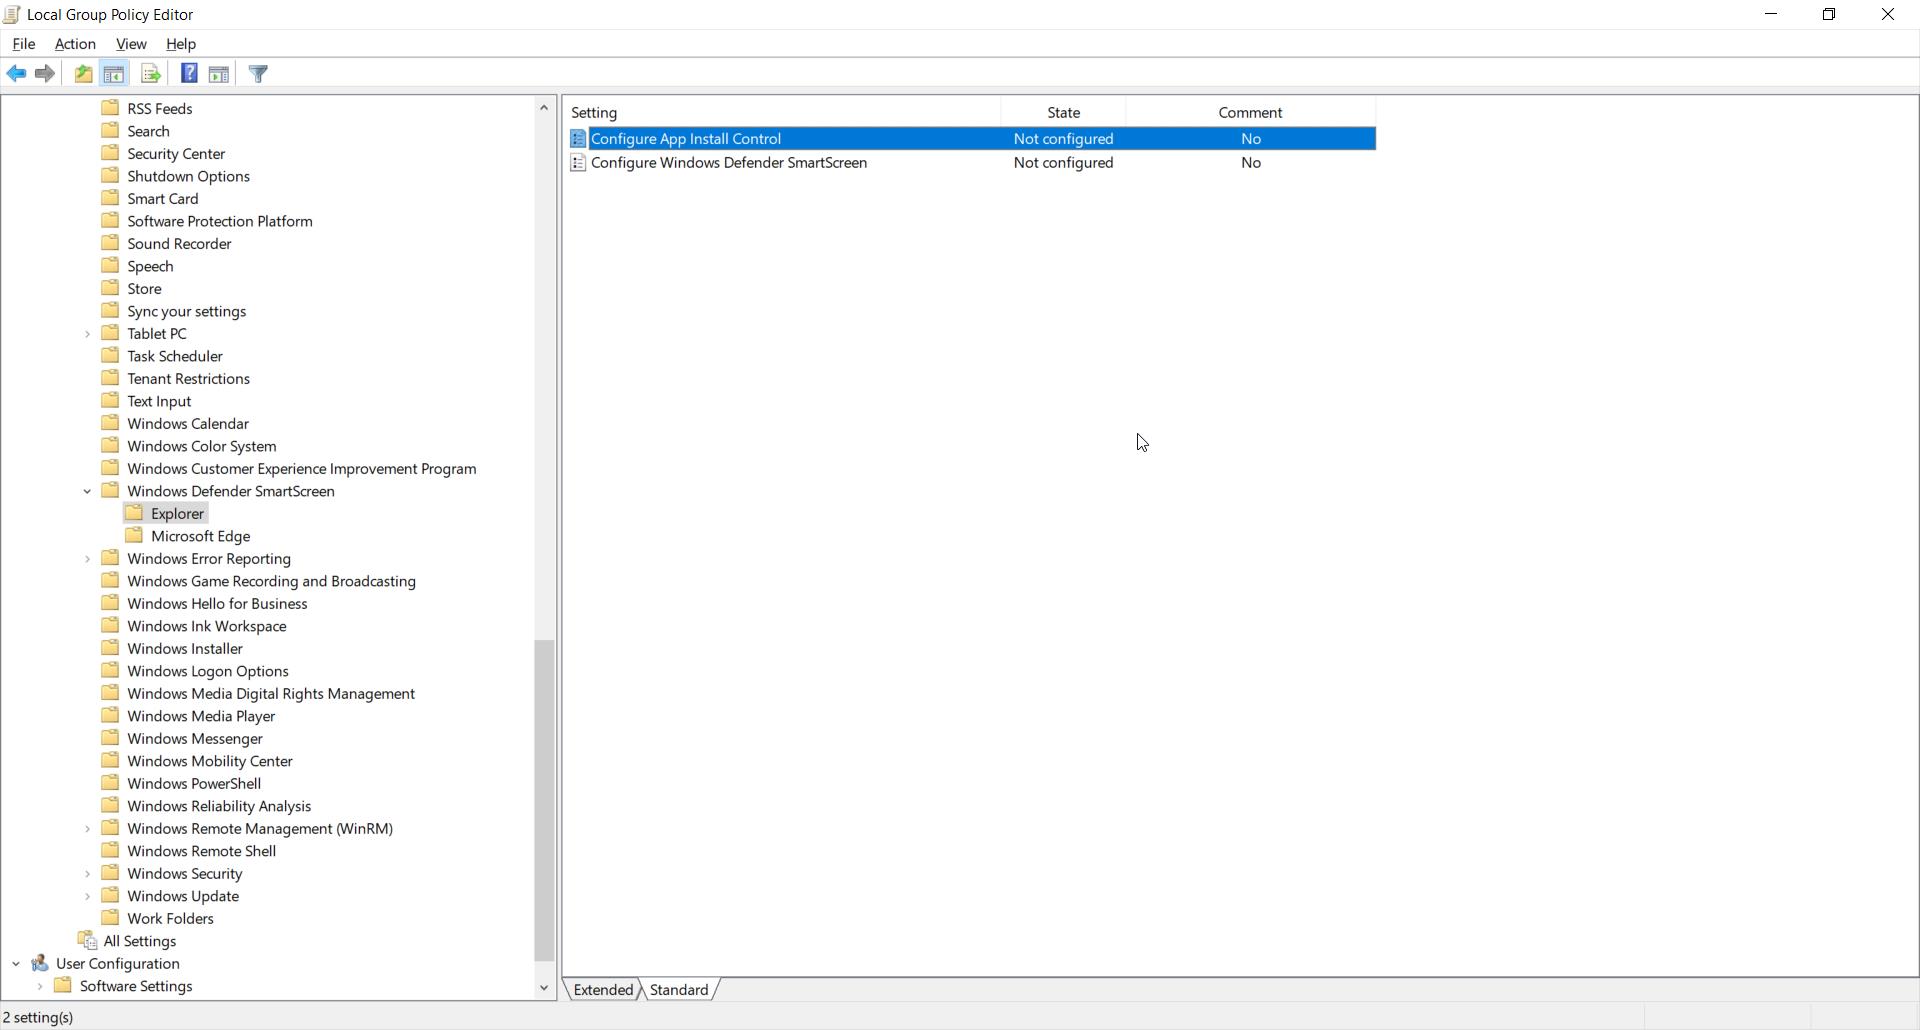
- Open the Local Group Policy Editor by pressing Win+R, typing “gpedit.msc” and clicking OK.
- Navigate to Computer Configuration -> Administrative Templates -> Windows Components -> Windows Defender SmartScreen -> Explorer.
- In the right pane, double-click “Configure App Install Control” to edit this policy.
- Select “Enabled” and choose “Turn off app recommendations” from the dropdown menu.
- Click Apply and OK to save the change.
- Restart your PC for the new setting to take effect.

After this policy change, Windows 10 will no longer show warnings or prevent you from installing apps from outside the Microsoft Store.
Method 3: Allow Apps from Anywhere via Registry Editor
If you can’t access the Group Policy Editor, modifying a couple Registry keys will also let you install third-party apps without restrictions. As always, be careful when editing the Registry as incorrect changes can cause system issues.
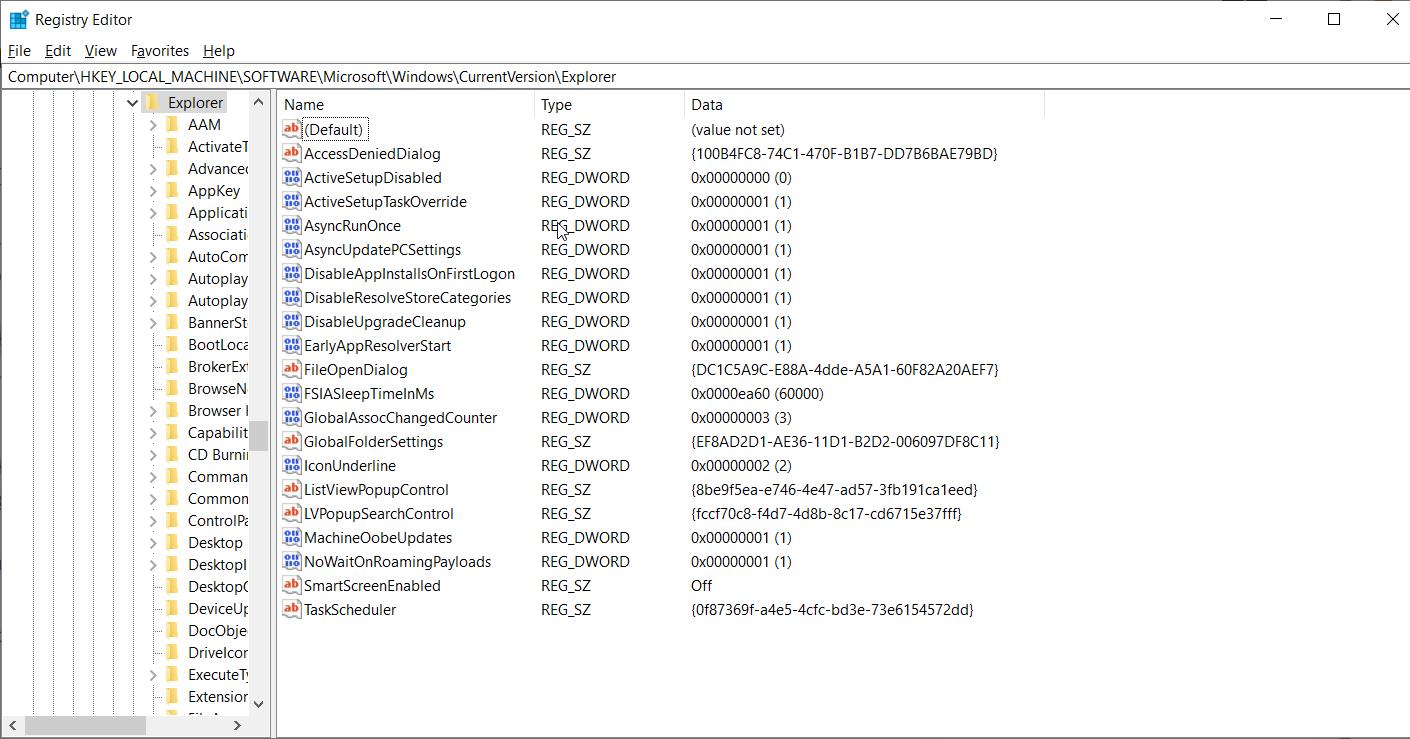
- Press Win+R, type “regedit”, and click OK to open the Registry Editor.
- First go to:
HKEY_LOCAL_MACHINE\SOFTWARE\Microsoft\Windows\CurrentVersion\Explorer - Look for a string value named “AicEnabled” in the right pane. Double-click it and change the value from “StoreOnly” to “Anywhere”. If the value doesn’t exist, create a new String value with that name and data.
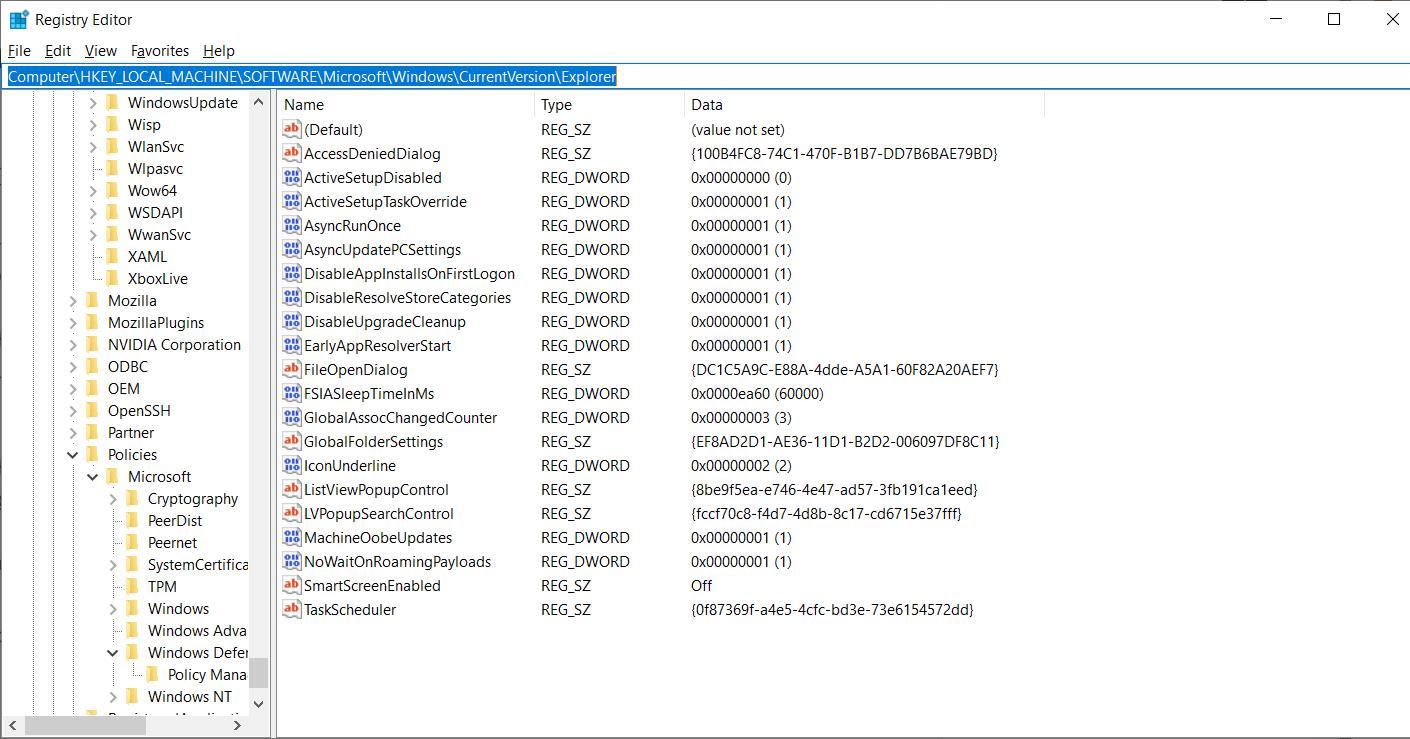
- Next, navigate to:
HKEY_LOCAL_MACHINE\SOFTWARE\Policies\Microsoft\Windows Defender\SmartScreen - Double-click the “ConfigureAppInstallControl” string and change its value from “StoreOnly” to “Anywhere”, or create it if missing.
- Close Registry Editor and reboot your PC.
Windows 10 will now allow installing apps from any source without displaying the “isn’t a Microsoft-verified app” warning.
Conclusion
By default, Windows 10 blocks installing apps from outside the Microsoft Store for enhanced security. However, this can prevent installing legitimate third-party programs that you trust and need.
Luckily, it’s quite straightforward to change Windows 10’s app recommendation setting and allow installing apps from anywhere. You can do this through the Settings app, Group Policy Editor (Windows 10 Pro and above), or Registry Editor.
The “Choose where to get apps” option is a vital feature for Windows users who want control over their software ecosystem.
While its disappearance can be frustrating, the solutions provided here should help you regain access to this important setting. Remember, if you’re uncomfortable making system changes, it’s always best to consult with a professional or contact Microsoft Support for assistance.
By following these steps and maintaining good system hygiene, you can ensure that you always have the freedom to choose your app sources while keeping your Windows PC secure and running smoothly.