With the introduction of Windows 11, Microsoft has implemented a new feature called Microsoft-Verified Apps. While this feature aims to provide users with a more secure and reliable app experience, some users may prefer to have more control over the apps they install on their system. In this blog post, we will walk you through a detailed, step-by-step process to turn off Microsoft-Verified Apps on Windows 11, giving you the freedom to install and use apps of your choice.
Step 1: Access the Windows Settings
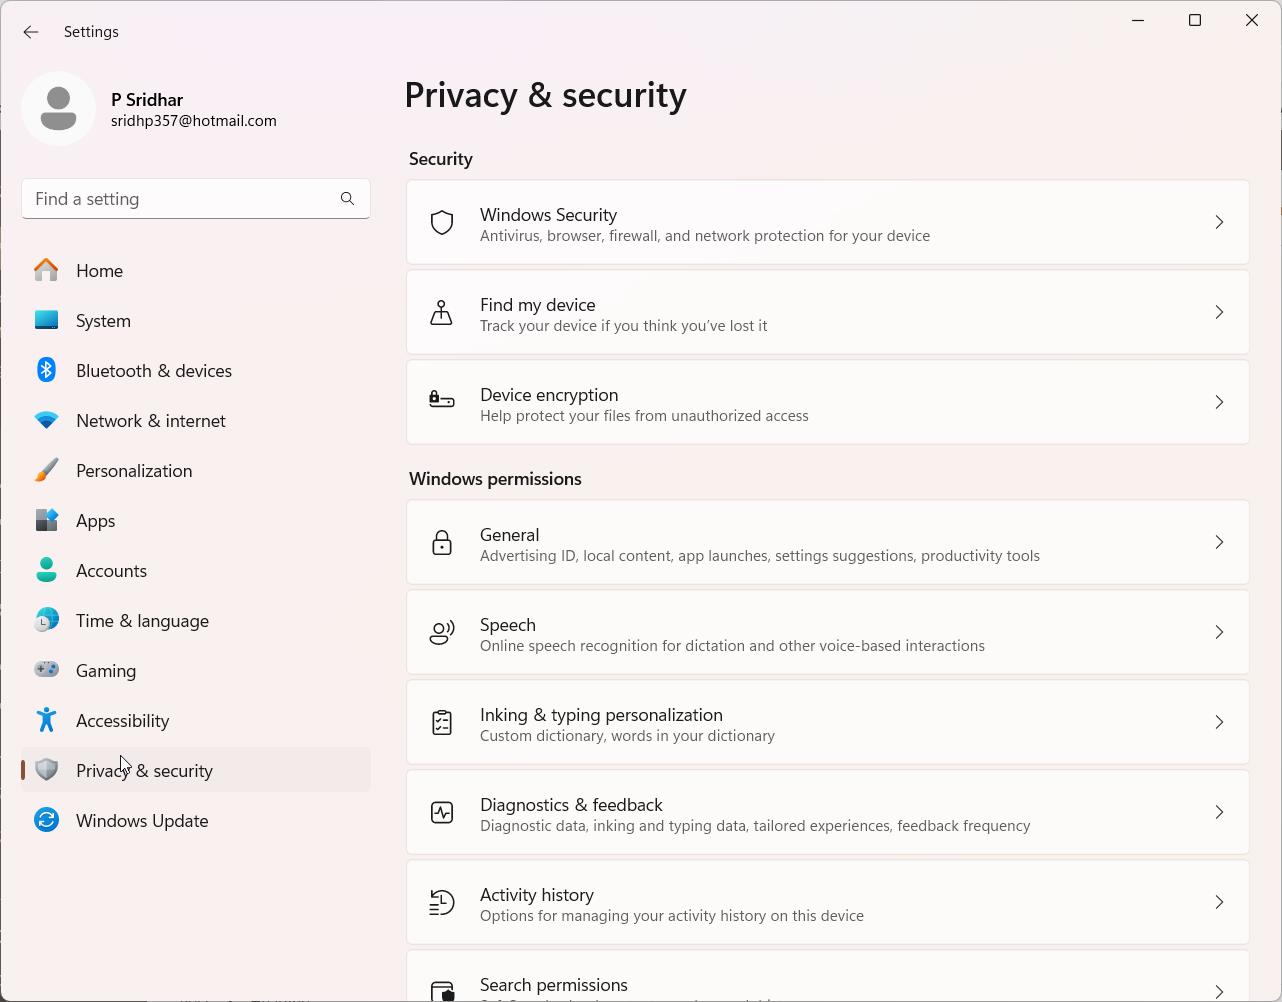
To begin the process of disabling Microsoft-Verified Apps, you need to open the Windows Settings. You can do this by either clicking on the Start menu and selecting the gear icon, or by pressing the Windows key + I on your keyboard. Once the Settings window appears, navigate to the “Privacy & security” section, which can be found on the left-hand side of the window.

Step 2: Locate the “Apps” Subsection
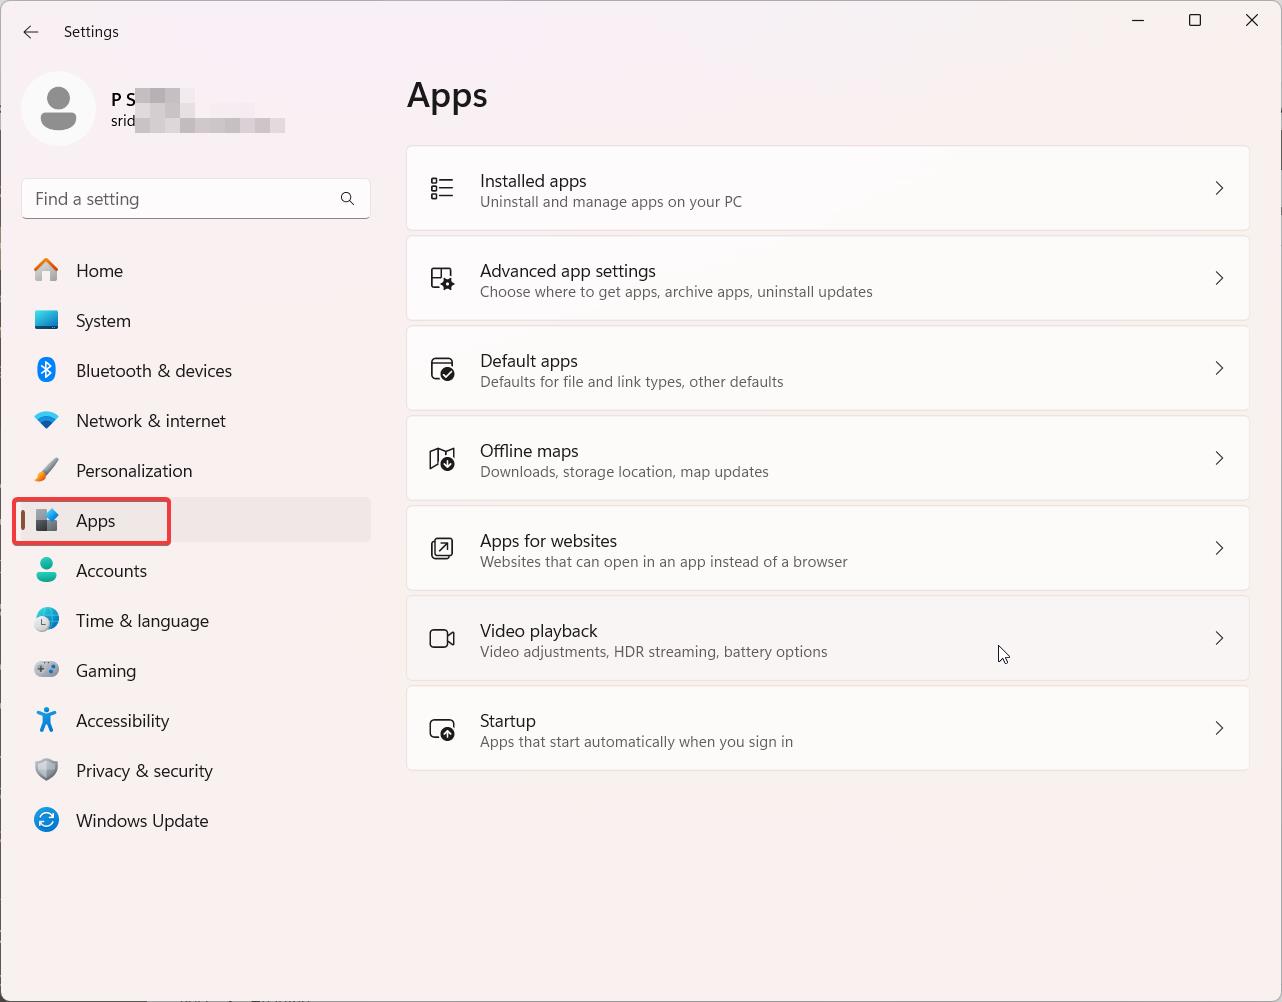
Within the “Privacy & security” section, scroll down until you find the “Apps” subsection. This subsection contains various settings related to app permissions, app diagnostics, and app-related features. Click on the “Apps” subsection to expand it and reveal more options.

Step 3: Find the “Choose where to get apps” Setting
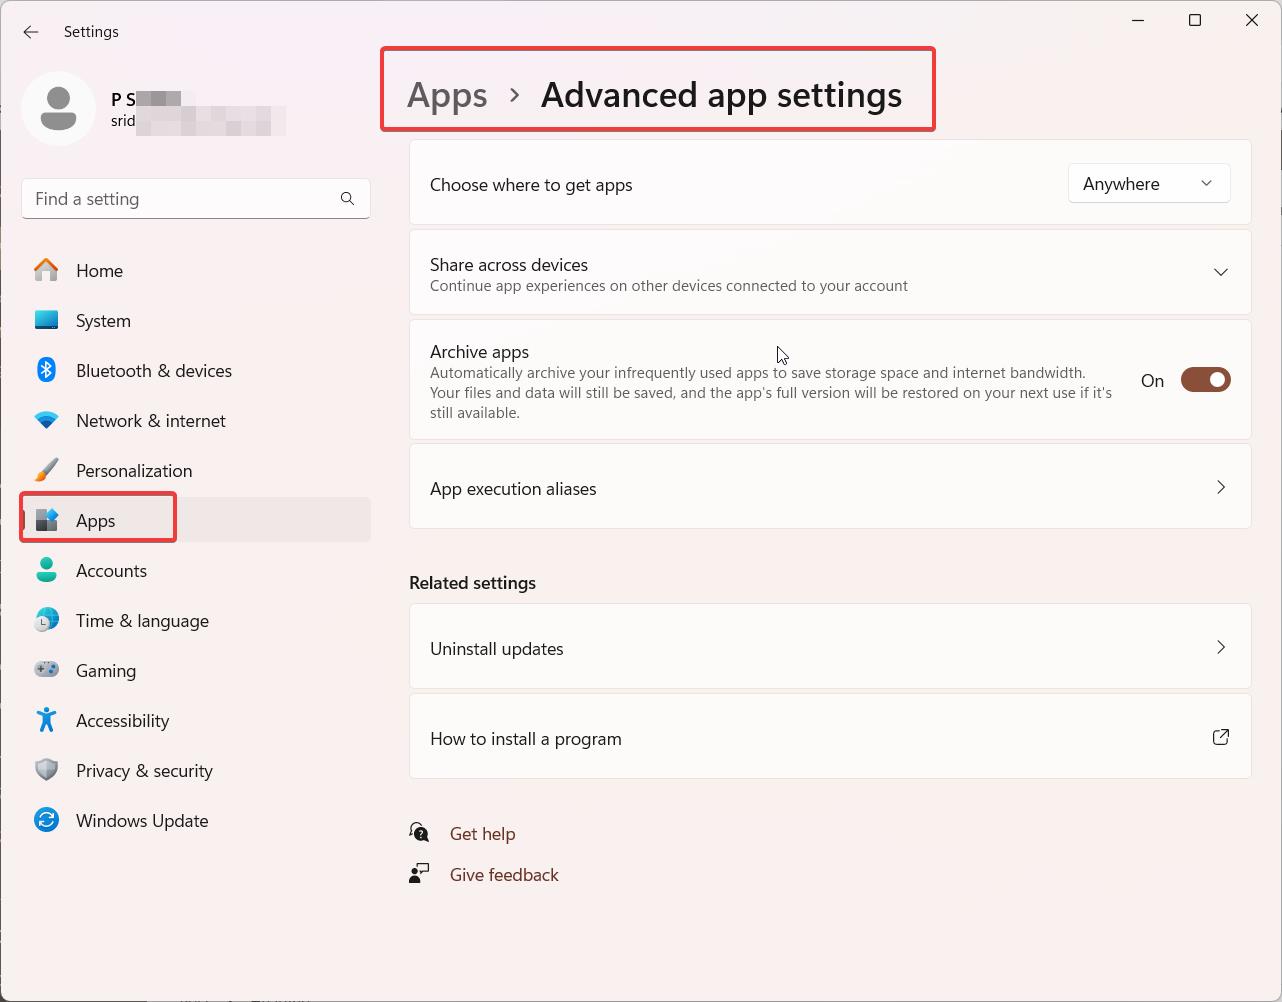
Inside the “Apps” subsection, look for the setting labeled “Choose where to get apps.” This setting allows you to control the sources from which you can install apps on your Windows 11 system. By default, this setting is configured to allow app installations only from the Microsoft Store and Microsoft-Verified Apps.

Step 4: Change the Setting to Allow Apps from Anywhere
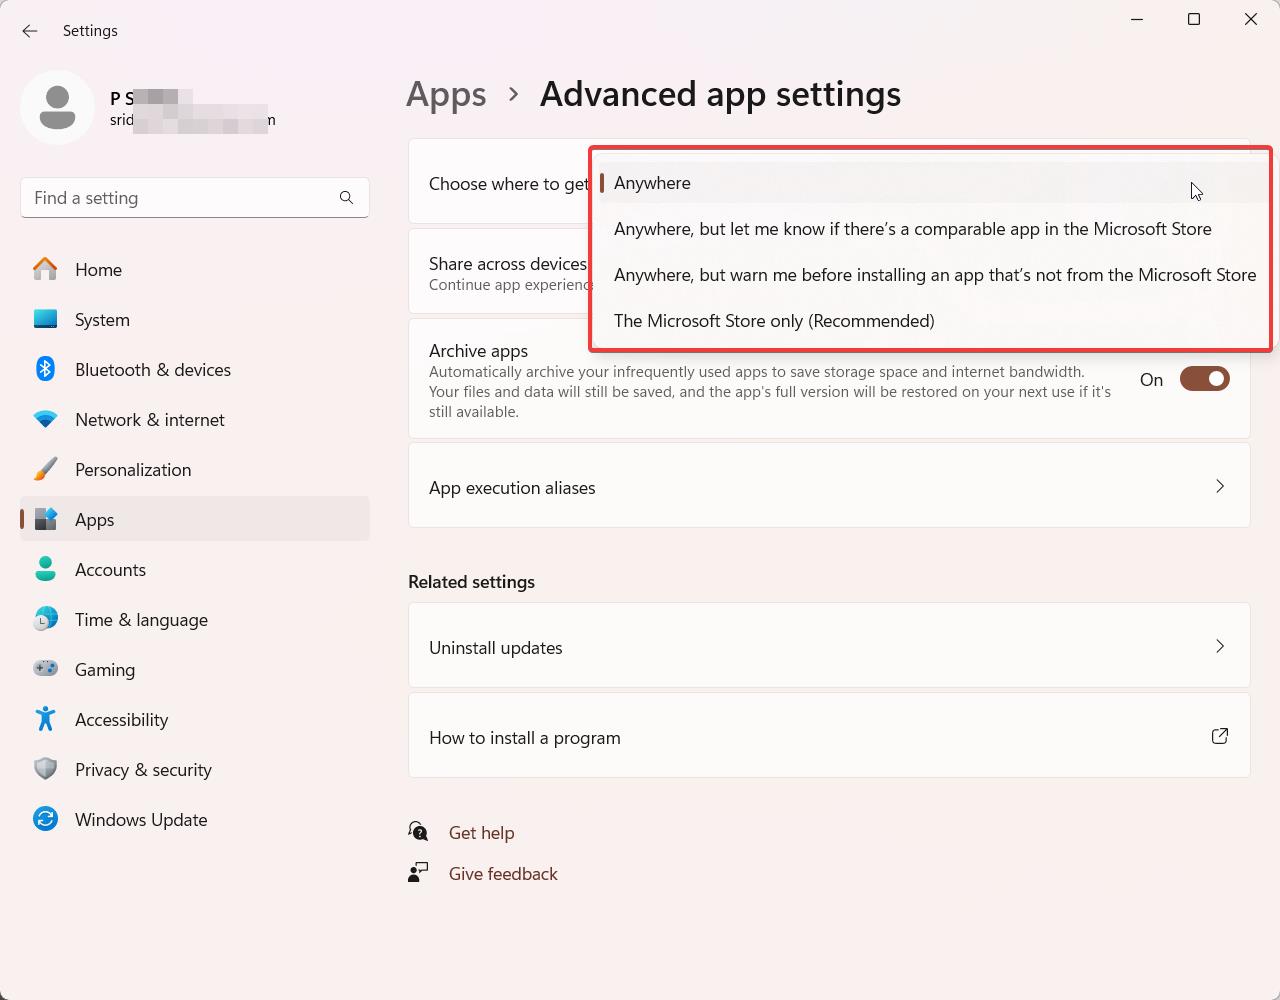
To disable Microsoft-Verified Apps and allow app installations from any source, click on the “Choose where to get apps” setting. A new window will appear, presenting you with three options:
- Allow apps from the Store only
- Allow apps from anywhere, but let me know if there’s a comparable app in the Store
- Allow apps from anywhere
Select the third option, “Allow apps from anywhere,” to remove the restriction on installing apps only from Microsoft-Verified sources. This will enable you to install apps from third-party websites, installers, or other sources outside the Microsoft ecosystem.

Step 5: Confirm the Change
After selecting the “Allow apps from anywhere” option, a confirmation prompt may appear, warning you about the potential risks associated with installing apps from untrusted sources. Read the warning carefully and consider the implications of allowing apps from anywhere. If you are confident in your decision and understand the risks involved, click on the “Yes” button to confirm the change.
Step 6: Restart Your Computer (Optional)
In most cases, the change will take effect immediately, and you will be able to install apps from any source without the need for Microsoft verification. However, if you encounter any issues or the change doesn’t seem to apply, it is recommended to restart your computer. A restart ensures that any pending system changes are properly applied and can help resolve any potential conflicts.
Conclusion:
By following these six detailed steps, you can successfully turn off Microsoft-Verified Apps on your Windows 11 system. This process grants you the flexibility to install apps from various sources, including third-party websites and installers, without the need for Microsoft’s verification. However, it is crucial to exercise caution when installing apps from untrusted sources, as they may pose security risks or contain malware.
Remember, Microsoft-Verified Apps are designed to provide a safer and more reliable app experience, and disabling this feature may expose your system to potential threats. Therefore, it is advisable to only install apps from reputable sources and to keep your system protected with up-to-date antivirus software.
By weighing the benefits and risks, you can make an informed decision on whether disabling Microsoft-Verified Apps aligns with your needs and preferences. With this comprehensive guide, you now have the knowledge and steps necessary to take control of your app installation process on Windows 11.
