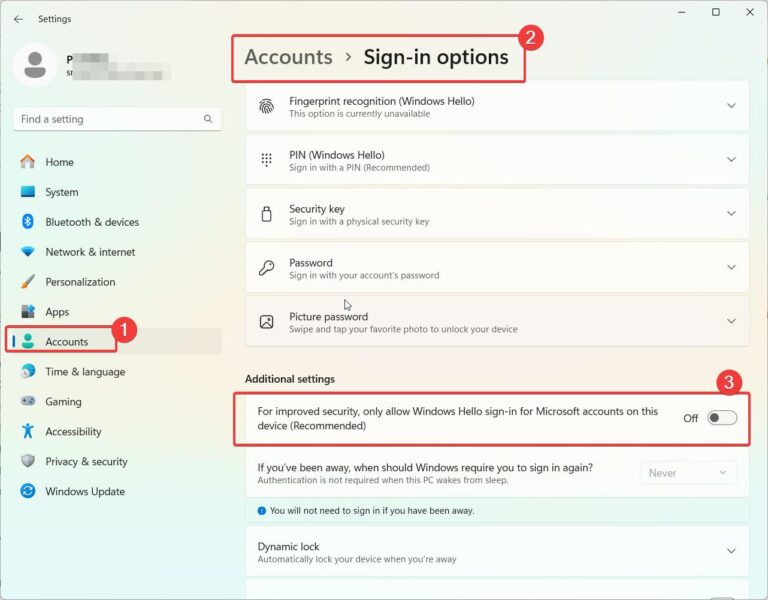
The “Local Security Authority Protection is off” warning on Windows 11 indicates that an important security feature has been disabled, potentially leaving your device vulnerable. This article will provide a comprehensive guide on understanding the Local Security Authority (LSA) protection in Windows and the various methods to resolve this security notification.
- What is Local Security Authority (LSA) Protection in Windows?
- Confirm the LSA Protection is Actually Disabled
- Why Does the LSA Protection Get Disabled on Windows 11?
- Install Pending Windows Updates
- Reset the Local Security Authority Subsystem Service
- Use DISM and SFC to Repair System Files
- Modify Registry to Enable LSA Protection
- Use Local Group Policy Editor to Turn On LSA Protection
- Conclusion
What is Local Security Authority (LSA) Protection in Windows?
The Local Security Authority subsystem service is a core Windows process that manages local security policies, user authentication, and auditing. The LSA protection specifically safeguards the integrity of the LSA process from malicious tampering or takeover.
In recent updates of Windows 11, you may not see this option in Windows Security. As I noticed in the Oct 2023 update, this option is no longer seen in the Pro version. This problem was resolved in the May update of Windows 11.
But LSA not visible is a different problem compared to disabled warning. Both are different errors. In some cases the LSA runs in the background, but is not visible in Windows Security or Defender. In such cases you can delete the latest update and check if it is visible.
As long as your computer is secure, you don’t have to worry. The only thing is that Windows Security should have a green tick mark in the system tray. It indicates that all the security processes are running properly and not having any problem.
When enabled, LSA protection prevents unauthorized changes to the security accounts manager (SAM) database, which stores user credentials like passwords. It does this by isolating the LSA process in memory to block attempts to inject code or modify data. This protects your credentials and critical system components from credential theft attacks.
So if you get a warning that LSA protection is disabled, it means this important security capability has been turned off, leaving your Windows device open to credential theft and other security risks. The good news is that in most cases, you can re-enable LSA protection to restore security.
Confirm the LSA Protection is Actually Disabled
Before going about the business of re-enabling LSA protection, first verify that the warning is real and not a false flag. Here’s how to check the status of LSA protection on Windows 11:
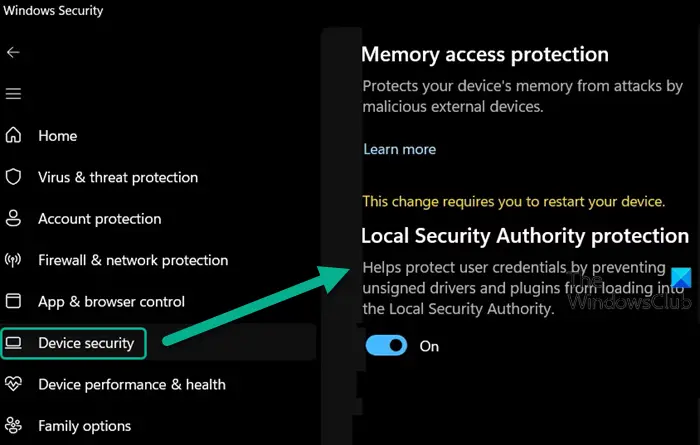
- Open Windows Security app by searching for it in the Start menu.
- Go to the Device security section.
- Click ‘Core isolation details‘ and scroll down to find the status of the LSA protection. If it is shown as off, then the error is genuine.
You can also check the status via the Event Viewer.
- Open Event Viewer (eventvwr.msc)
- Expand Windows Logs > System.
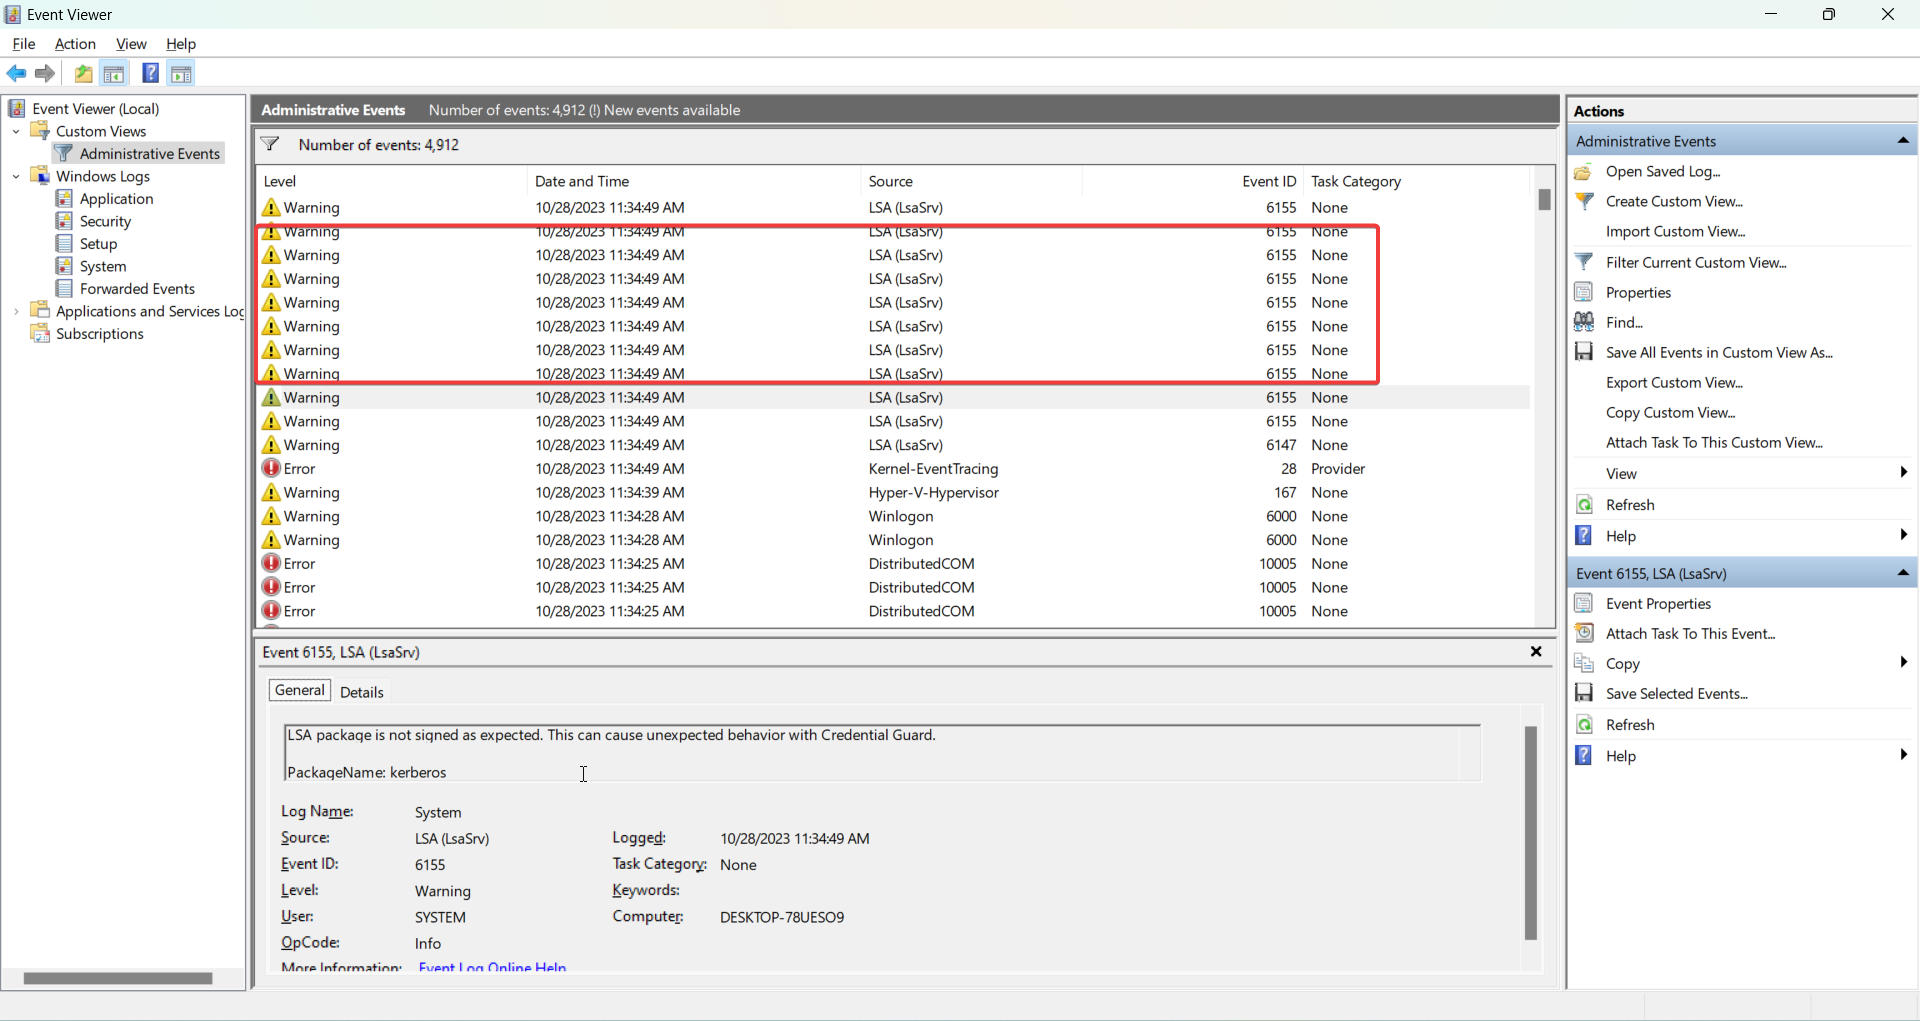
- Look for event ID 56 or 6155 from the source LSA Shell. The description will state if LSA protection is on or off.
If the LSA protection does show as disabled in the Windows Security app and Event Viewer, use one of the following solutions to turn it back on.
Why Does the LSA Protection Get Disabled on Windows 11?
There are a few reasons why you may suddenly get a notification that the LSA protection has been turned off on your Windows 11 device:
- Windows updates – Certain Windows or driver updates have been known to inadvertently flip the LSA protection switch to the off position. This behavior has been noticed especially with updates for Windows Defender Antivirus.
- Manual tweaks – Some users may have manually disabled LSA protection, perhaps while tweaking settings to resolve previous issues. Disabling core isolation can also turn off LSA protection.
- Corruption – System file corruption has also been known to randomly disable the LSA protection. A corrupted registry entry or core system file could be the culprit.
- False warnings – In some cases, the warning may be erroneous if Windows incorrectly reports the status of the LSA protection. So the first step is to verify the error is genuine.
Regardless of what caused it, having LSA protection disabled means your device is at higher risk. The good news is that this can be easily remediated using one of several methods.
Install Pending Windows Updates
One quick first step is to check for any pending Windows updates and install them. Microsoft periodically releases patches that fix issues with LSA protection getting erroneously disabled.
- Go to Settings > Windows Update and click Check for updates.
- Install any available updates. Restart your PC.
- Now check if the LSA protection shows as enabled in the Windows Security app. If so, the problem is fixed.
Recent Windows updates known to resolve this LSA protection issue include:
- KB5007651 – Fixes problems with Windows Defender Antivirus disabling LSA protection.
- KB5006670 – Addresses LSA protection getting disabled on Windows 11.
So before trying anything else, installing the latest updates may automatically fix the disabled LSA protection problem for you.
Reset the Local Security Authority Subsystem Service
Resetting the Local Security Authority Subsystem Service restarts the service and can re-enable LSA protection if it was disabled due to corruption or conflicts.
Here are the steps to reset the LSA service:
- Press Win key + R to open the Run dialog box.
- Type “services.msc” and click OK to open the Services manager.
- Find the service named Local Security Authority and double click to open its Properties.
- On the General tab, change the Startup type to Automatic if needed.
- Click the Stop button to stop the service. Next click Apply.
- Now click Start to restart the service, and click OK.
This will reset the LSA service, which should now show LSA protection as enabled again in the Windows Security app.
Use DISM and SFC to Repair System Files
Corrupted system files could also be responsible for flipping the switch on LSA protection. Running DISM and SFC scans can detect and repair broken system files that may be causing this.
DISM scan repairs the Windows image while SFC scan fixes system file errors. Here are the commands to run these scans:
- Open an admin PowerShell window and run:
DISM /Online /Cleanup-Image /ScanHealth- Follow up with:
DISM /Online /Cleanup-Image /RestoreHealth- Once DISM scan completes, run:
SFC /scannow- Restart your computer once the scans finish. The corrupted files leading to disabled LSA protection should now be restored.
Modify Registry to Enable LSA Protection
You can also manually re-enable LSA protection by turning on the relevant settings in the Windows registry. Here are the steps:
- Open Registry Editor (regedit.exe).
- Navigate to
HKEY_LOCAL_MACHINE\SYSTEM\CurrentControlSet\Control\Lsa - Right click on the Lsa folder and select New > Dword Value.
- Name it
RunAsPPL. - Double click on it and set the Value data to
1and click OK. - Repeat steps 3-5, creating a second Dword value named
RunAsPPLBoot. Set its Value to1. - Restart your PC for changes to take effect.
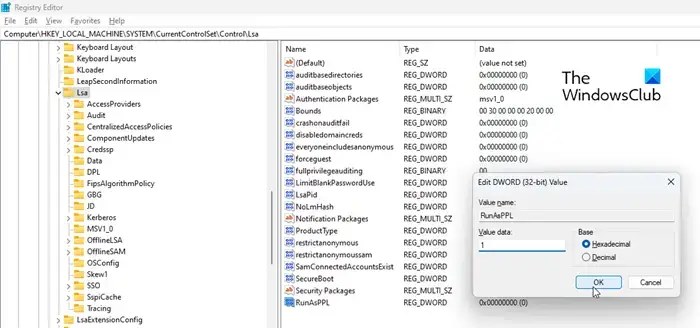
These registry modifications will enable LSA protection for both the boot and runtime environments. You can now verify protection is re-enabled in the Windows Security app.
Use Local Group Policy Editor to Turn On LSA Protection
On Windows 11 Pro, Enterprise and Education editions, you can use the Local Group Policy Editor to enable LSA protection. Here are the steps:
- Type “gpedit.msc” in the Start menu to open the Local Group Policy Editor.
- Go to
Computer Configuration > Administrative Templates > System > Device Guard. - Double click on “Turn On Virtualization Based Security” and select Enabled. Click Apply.
- Next, go to
Computer Configuration > Administrative Templates > MSS (Legacy) - Double click on “Turn On Virtualization Based Security: Select Platform Security Level” and set it to Secure Boot AND DMA Protection.
- Restart your PC. LSA protection should now be enabled again.
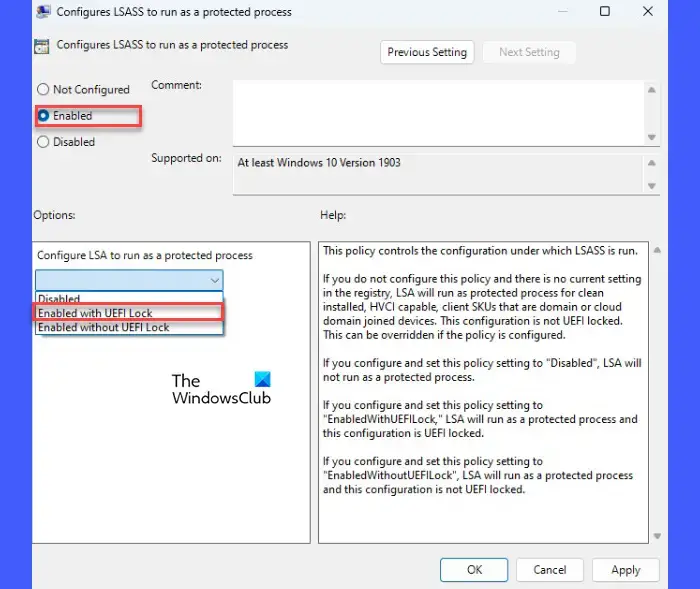
This uses Group Policy to turn on virtualization security features including LSA protection.
Conclusion
The “Local Security Authority Protection is off” warning should not be ignored, as it exposes your Windows device to credential theft and system compromise.
Thankfully, there are multiple straightforward methods to re-enable LSA protection. Updating Windows, resetting the LSA service, running DISM/SFC repairs, modifying the registry, and using Group Policy can all help turn LSA protection back on.
Just be sure to first confirm the error is genuine and not a false flag. With LSA protection re-enabled, you can rest assured your Windows 11 device remains protected from identity and security threats.


