With the right drivers and software like Volume Mixer, Sound Control Panel and virtual cables, sending system and app audio to different outputs is possible in Windows 11.
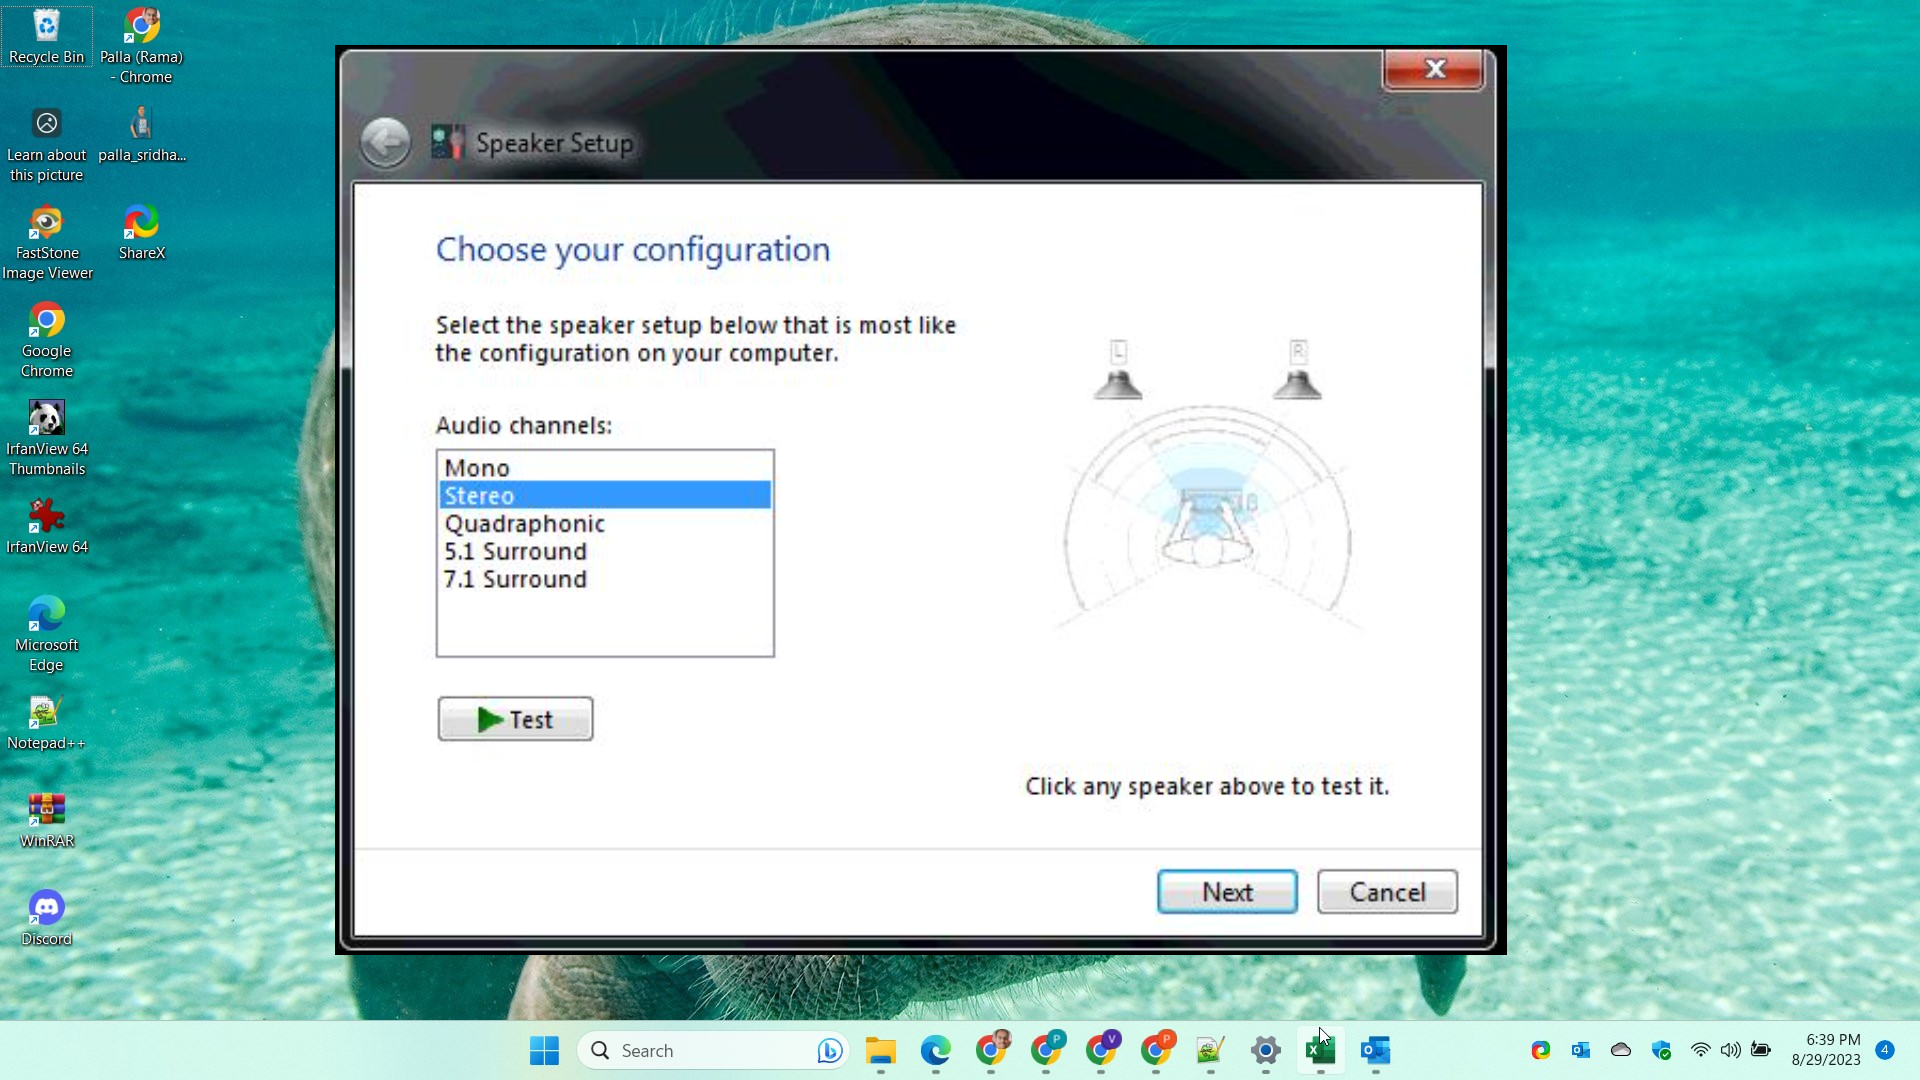
Some other tips are to set communication apps to use a different output from music/media apps, disable unused devices to avoid switching outputs accidentally, and configure individual surround sound speakers properly in the sound control panel. With the right setup, handling multiple audio outputs in Windows 11 is seamless.

Use the Sound Control Panel
The classic Sound control panel in Windows 11 allows you to set default output devices and manage multiple audio sources. You can switch playback between speakers, headphones, HDMI displays etc.

Playing Audio to Multiple Outputs in Windows 11
Having the ability to play audio from different devices at the same time is invaluable if you regularly connect to monitors, TVs, headphones, or speakers. Thankfully, Windows 11 offers a few easy ways to send audio from apps and system sounds to separate outputs.
Use the Sound Control Panel
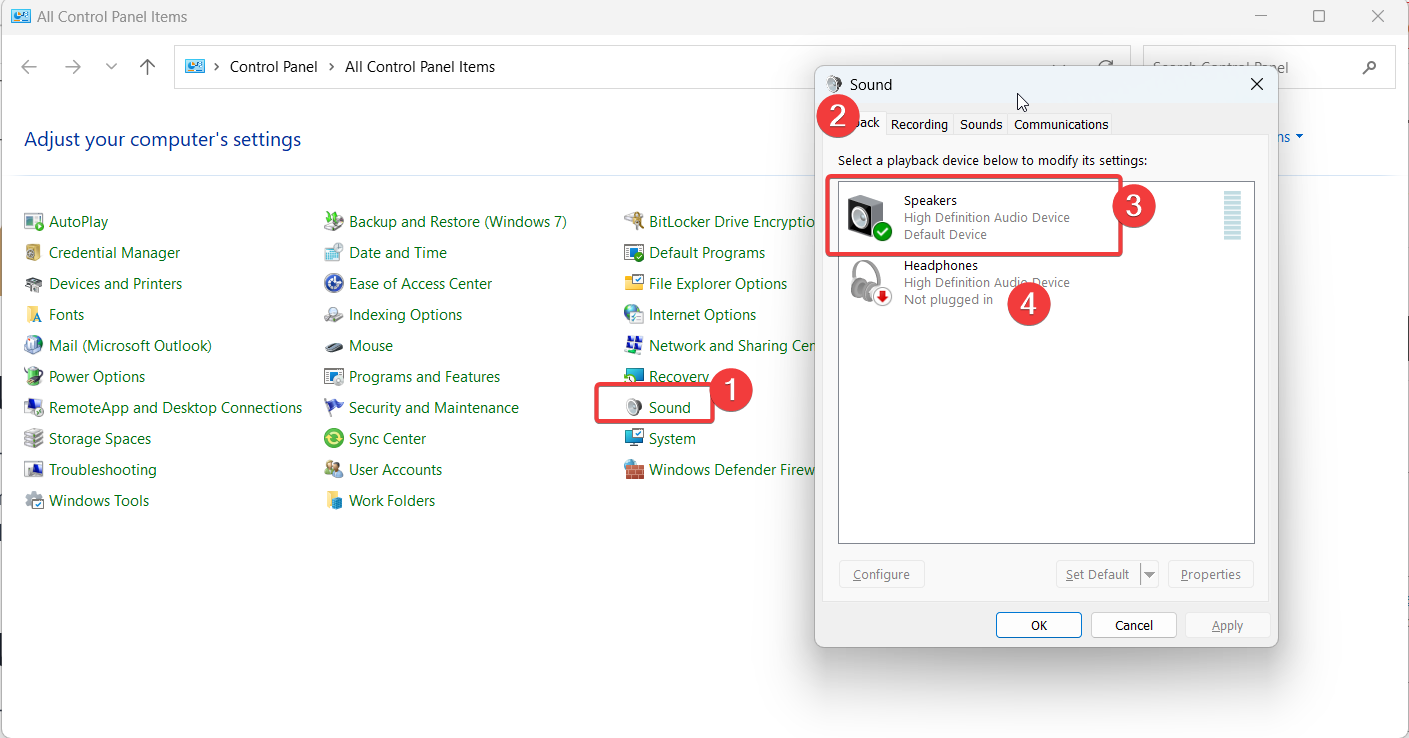
The classic Sound control panel in Windows provides the most control over audio devices and routing. To open it, press Windows + R and type “control panelsound” then press Enter.
In the Playback tab, you can set your default sound device. This will be used for system sounds and apps that don’t override the default. You can also configure each device, enable/disable them, and set custom names.
Switch to the Recording tab to choose your default microphone and manage those inputs similarly.
Configure Program Devices
For finer control, switch to the Program tab in the Sound control panel. Here you can see apps and processes sending audio. Select any program and use the “Set Default” drop-down to change which audio device that specific app uses for playback.
For example, you could set your web browser to use headphones while media apps use speakers. Click Apply after making changes.

Use the Volume Mixer
An easier way to manage multiple playback devices is using the volume mixer. Right-click the speaker icon in the system tray and select Volume Mixer. This brings up sliders for apps currently producing sound.
Hover over an app and use the device dropdown to change which output it plays through on the fly. The volume mixer remembers your per-app device preferences.
Use the Windows Volume Mixer
The volume mixer lets you control the volume of individual apps. You can set applications to output to different devices like headphones vs speakers.
Install Audio Device Drivers
Installing the latest audio drivers from your hardware manufacturer ensures compatibility with multiple outputs. Keeping drivers updated is key.
If you have trouble getting apps to output to multiple devices at once, ensure you have the latest audio drivers from your hardware manufacturer installed. Device drivers allow simultaneous output to different endpoints.
While basic Windows audio handling has its limitations, the Sound panel and Volume Mixer provide the essential controls needed to direct different apps to separate audio outputs like speakers, headphones, and HDMI connections based on your needs.
Use Virtual Audio Cable Software
Virtual audio cable software like VB-Audio VoiceMeeter allows managing multiple outputs in a single interface. Useful for audio production.
Here is a step-by-step guide on how to use VoiceMeeter to play audio from multiple outputs on a Windows 11 PC:
What is VoiceMeeter?
VoiceMeeter is a virtual audio mixer software that allows managing multiple audio inputs and outputs in Windows. It creates virtual devices you can route audio through.
Installing VoiceMeeter
- Download the latest VoiceMeeter from vb-audio.com
- Run the installer and choose your desired version. VoiceMeeter Standard is free.
- Follow the prompts to install VoiceMeeter on your Windows 11 system. Restart your PC.
Configuring VoiceMeeter Virtual Devices
- Launch VoiceMeeter. It adds a speaker icon in your system tray.
- Right-click the tray icon and make sure “VoiceMeeter Input” and “VoiceMeeter Output” are set as the default devices in Windows sound settings.
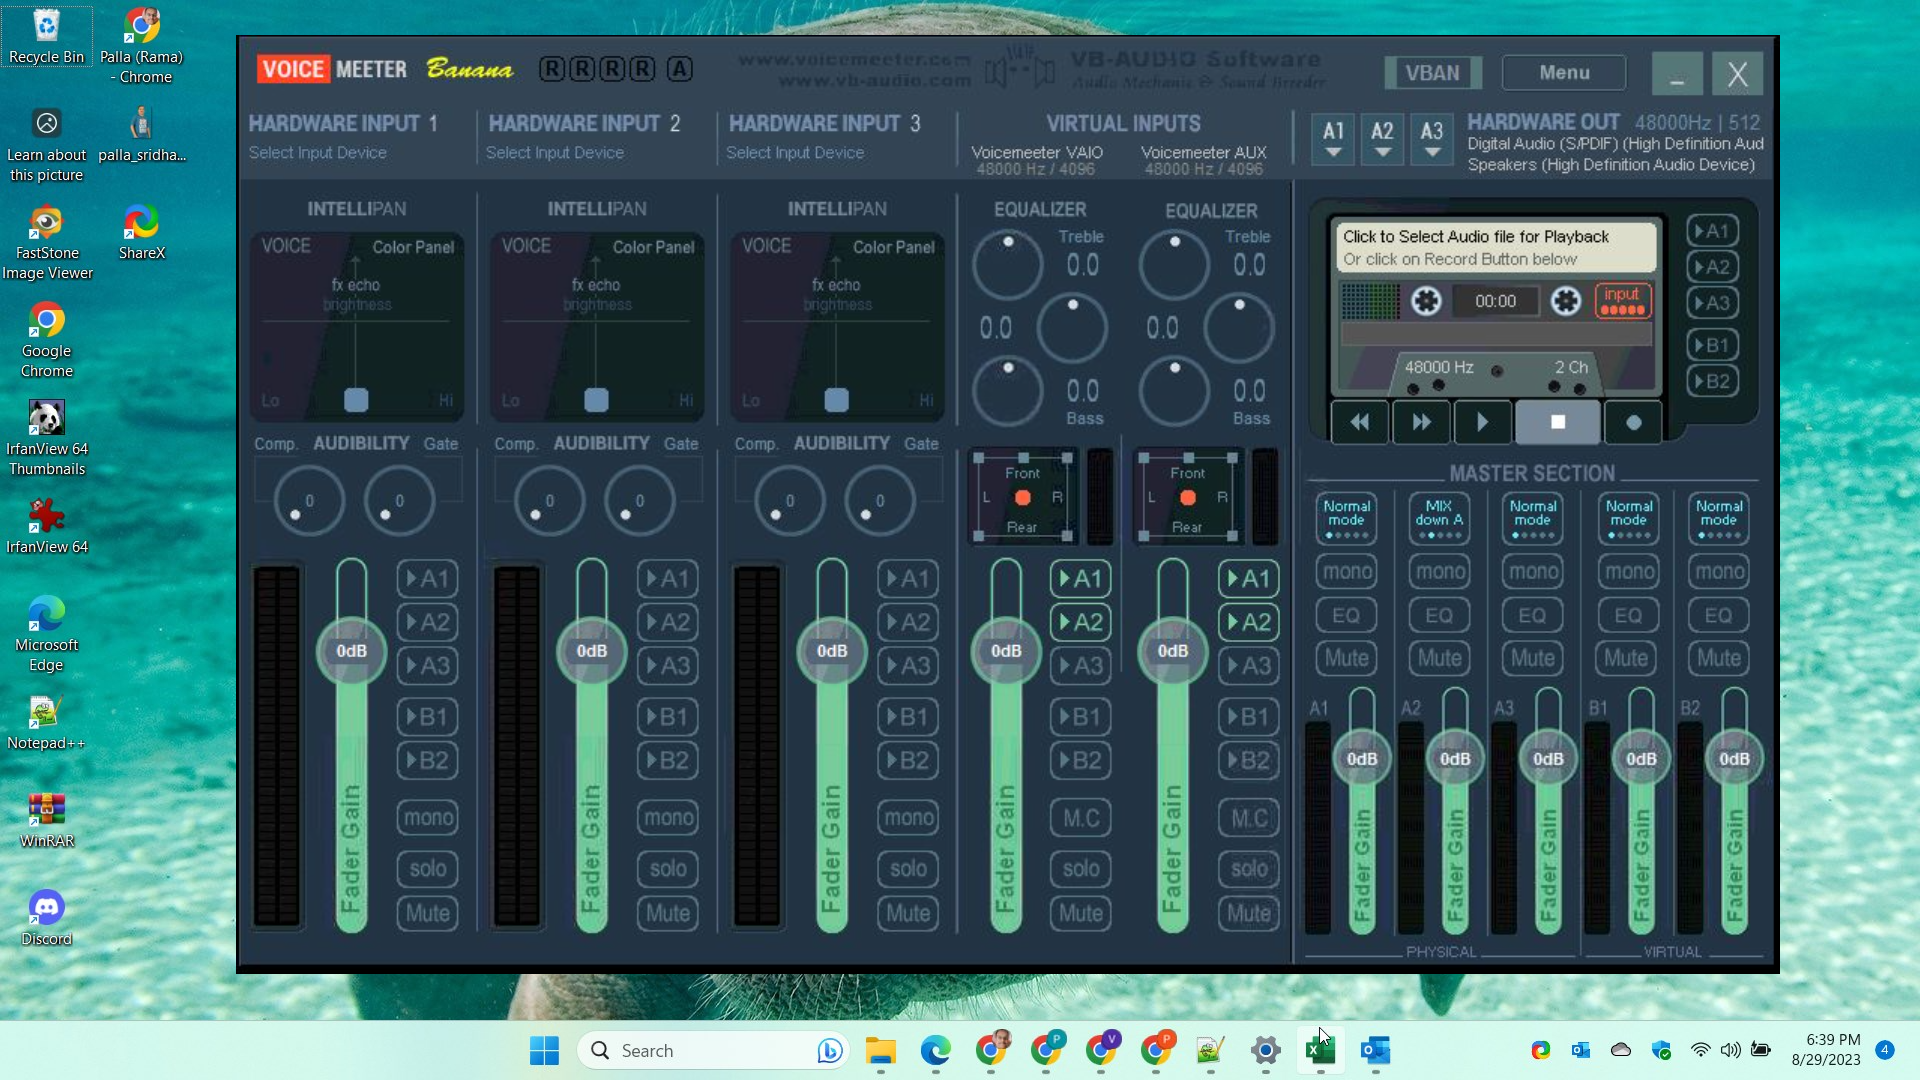
- In VoiceMeeter, you’ll see virtual input and output devices labeled A1, A2, A3 etc. These can be routed to physical outputs.

Sending Audio to Multiple Outputs
- Connect your physical output devices like speakers, headphones, HDMI monitors etc.
- In VoiceMeeter, choose which physical devices to associate with the virtual A1, A2, etc outputs.
- Route apps to different virtual device outputs. For example, have Spotify play through A1 (speakers) and browser audio through A2 (headphones).
- Adjust the gain levels for each output device as needed.
With this virtual mixing approach, you can seamlessly send simultaneous audio streams to multiple physical playback devices. VoiceMeeter adds flexible audio management to Windows 11.
Use a Dedicated External DAC
A USB DAC (digital-to-analog converter) bypasses built-in sound and provides superior sound quality with multiple output options for speakers, headphone amps etc.


